Patient Profile
Last updated: December 10, 2025
The patient profile is a centralized space to register patients and store critical demographic, contact, and billing information. This guide outlines key sections of the profile, including patient demographics, consents, care team roles, and contact management.
Patient Heading
Once a profile is created, key patient details are displayed in the Patient Banner at the top-left corner of the profile and chart. This includes:
First and last name, preferred name will show in parentheses
Date of birth, age, and sex at birth
Preferred time zone, if applicable
Phone number
Canvas-generated MRN (Medical Record Number)
Patient photo: Image is a gray avatar by default. This can be changed to the patient's photo through the Canvas Remote iOS app by clicking the patient image.
Administrative caption: Free text field that can be used for any reminders and notes related to insurance, copays, payments, etc. Visible in the profile, appointment cards, search results, and print views but not within the chart.
Badges: The banner displays status badges such as Inactive or Deceased.

Patient Demographics
Managing Demographics
The Demographics section captures key patient details and allows for updates:
Click Edit to modify any field. Required fields, indicated by a red asterisk (*), must be completed to save changes.
Managing Patient Status
Active/Inactive Status: Toggle the checkbox at the top of the demographics form. When a patient is marked inactive, an Inactive badge appears on the banner.
Deceased Workflow: Marking a patient as deceased triggers automated workflows:
Cancels future appointments and removes follow-up requests
Marks contact information as unverified to block outgoing messages
Requires optional entry of date of death, cause, and comments.
If a patient was incorrectly marked as deceased, unchecking the box restores their active status. Note that automated actions, such as canceled appointments, are not reversed.

Patient Preferences
Primary care provider, referring provider, and time zone can be added under the patient’s preferences.
Primary Care Provider (PCP): A free-text field to record the PCP; it is not tied to workflows.
Preferred Scheduling Time Zone (if applicable): Time zone to display the patient's appointments in for scheduling. Review
Business Lines (if applicable): Location for patient communication. Refer to Business Lines for Patient Communication for further details on this setting

Preferred Pharmacies
Preferred pharmacies streamline prescribing workflows. Pharmacies are sourced from the Surescripts directory and can be searched by name, address, store number, or phone number.
Multiple Pharmacies: Add multiple pharmacies (e.g., mail-order and brick-and-mortar) for a single patient.
Default Pharmacy: Designate one pharmacy as the default, which will pre-populate in prescribing workflows. Additional pharmacies appear as quick-picks in the pharmacy dropdown.
Pharmacy Type: Types (e.g., retail, mail-order) display as badges in search results and once added.

Patient Consents
Consents are used to track and manage patient agreements, such as treatment authorization.
Adding a Consent
While in the patient's profile on the left panel expand the Patient Consents section.
Mandatory consents will be added automatically
Non-mandatory consents can be added via the Add Consents button
Select the consent name and complete the fields
Default expiration is based on configuration (e.g., 1 year, end of the calendar year, or no expiration).
Select Custom Date to override the default.
If documentation is required, the warning “Document required” will display. Link the consent document through Data Integration.
Once processed, view the document by clicking View Document. Updates to consents with newer effective dates will replace older versions in the profile.
Updating Consents
By clicking the Edit button (pencil icon), the state, effective date and/or expiration date can be modified.
Non-mandatory consents can be removed from the list by clicking Clear. Any associated document will remain accessible in the Admin Documents section of the chart.
Consents added through Data Integration are automatically reflected in the patient profile. For consents requiring documentation, adding them directly in Data Integration can streamline the process by eliminating the need for additional steps.
Care Team
The Care Team feature allows assignment of roles to team members involved in a patient’s care.
Care teams roles must be configured by a practice admin before members can be designated in the patient profile. The admin process for Care Teams is outlined here.
Managing Care Team Members
Click Add to assign a care team member and role.
Use the Edit button to update or remove team members and roles.
Inactive team members are marked with an Inactive label for visibility.
Care Team Lead
The designated Care Team Lead is indicated by the blue checkmark next to Team Lead. They play a central role in workflows such as:
Messaging: Incoming messages are routed to the care team lead.
When a care team lead has not been assigned AND no prior messages have been sent to the patient, incoming patient messages will be assigned to Canvas Bot.
When a care team lead has not been assigned BUT a staff member has previously messaged the patient, incoming patient messages will be assigned to the staff member who last messaged the patient.
Printed Documents: Lab orders, full chart PDFs, and specimen labels display the care team lead’s information.
Populations: Intervention messages and patient data exports include the care team lead’s name.
Data Integration: Defaults the lead as the reviewer for workflows.
Health Gorilla: Lab vendor
Ordering provider fallbacks to care team lead, if original provider does not have a valid NPI
Reviewer falls back to Care Team Lead, if NPI given by Health Gorilla cannot be found
Medications:
If no care team lead is assigned, fallback logic ensures messaging and other workflows continue as expected.

Addresses
Patient addresses are required for any practices that will be ordering labs and/or prescribing medication.
At least one address must be marked with a use of Home and a type set to Postal or Both to ensure statements, lab orders, and e-prescriptions process correctly.
Marking an address as Old prevents it from being used for these workflows.
9-digit ZIP codes for patient addresses can be supported by navigating to the Constance: Config setting and enabling the ALLOW_PATIENT_ADDRESS_ZIP4_INTERNATIONAL option under the General Configuration heading. To enable this, check the box next to the setting and click Save.
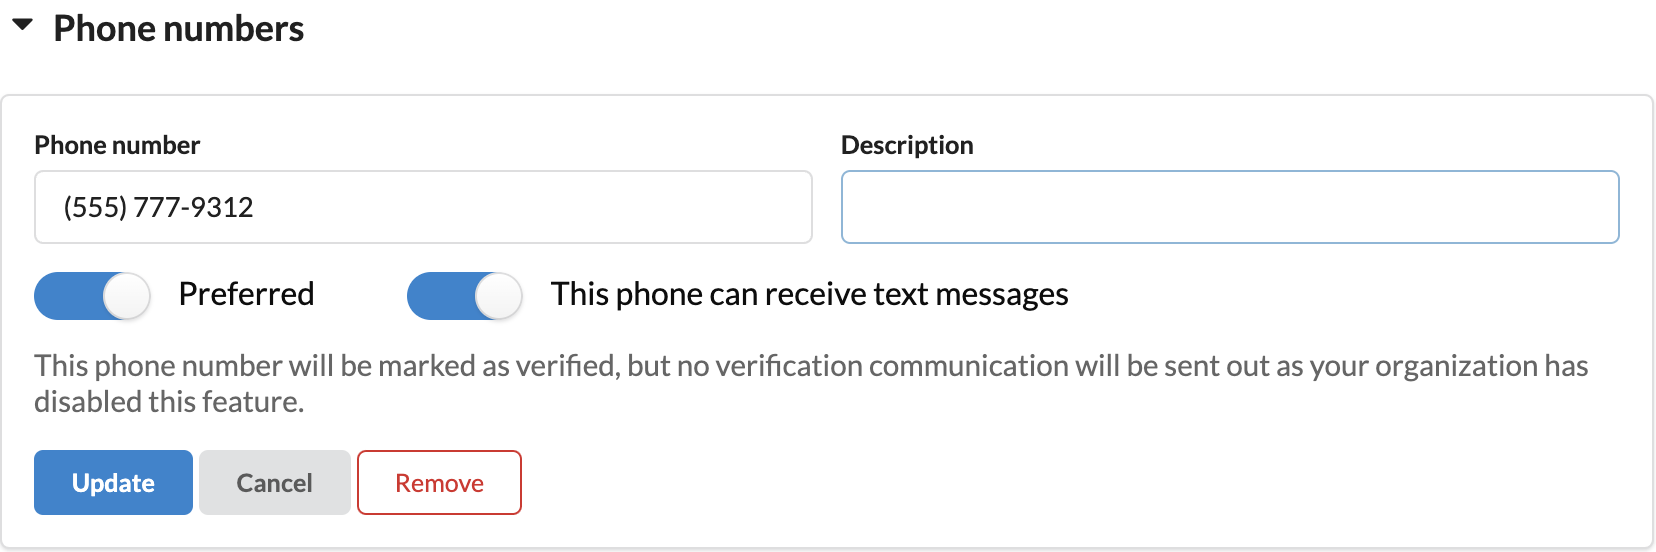
Phone Numbers
Add multiple phone numbers with free-text descriptions.
Use the Preferred toggle to set the primary number.
Enable This phone can receive text messages for numbers used in outbound text communication through the Canvas app
A text message will be sent to the patient to verify their contact in order for them to begin receiving communication.
Patients can reply STOP to a text message and any time to unenroll.
A phone number can only be verified for a single patient. Verifying the same phone number across multiple patients is not supported.
Emails
Add multiple email addresses with free-text descriptions.
Use the Preferred toggle to indicate the primary email.
An email will be sent to the patient to verify their contact in order for them to begin receiving communication.
Verified emails must be unique to each patient. If an email needs to be shared across multiple patients, apply subaddressing as a workaround. The format is
address+tag@domain.com.For example, if the shared email is familycare@example.com, you can use:
familycare+child1@example.com for one child
familycare+child2@example.com for another child
These emails will all deliver to familycare@example.com, but each patient’s chart will have a unique identifier.

Phone number and email verification can be disabled by an admin through Constance: Config > ENABLE_VERIFICATION_MESSAGES setting. Uncheck the box to disable contact verification messages.
Contacts
The Contacts section ensures all relevant individuals connected to the patient are included. Contacts can be manually added, or you can link existing patient records. Each contact can include:
Name: Users can either add a free text name or search for an existing patient chart. As you type, the field will populate with search results. Choosing the top selection or tabbing will keep the text you typed.
Once you have navigated to the next field, the record can no longer be updated. You must retype the free text field or search for a different patient.

Phone/Email:
Add manually if the contact was added via free text
If a linked patient is selected, the phone and email will display the primary contact points from that patient as read only. Updates to that patient will be reflected in the record.
Categories: Select from pre-configured options that include relationships and tags (e.g., Father or Power of Attorney, Emergency Contact, etc). Contacts can have one or multiple categories, displayed as colored labels.
Comments. Free text notes
Admins can add new categories via the Practice: Contact Categories setting. Review process here

Power of Attorney Workflow
If a contact is categorized as Power of Attorney, they appear as an option in Data Integration when uploading related documents.
Linked documents can be viewed directly from the contact record in the patient profile.
Contacts can be updated or removed at any time. Deleting a contact does not impact previously linked documents.
Patient ID Card
To add an ID card to a patient profile, you will need the Canvas Remote app on an iOS device.
Select the
Link Phonebutton on the right side of the patient profile page to generate the QR code for the Canvas Remote app
Scan the QR code in Canvas Remote and select Capture Identification Card to take a photo.
Adjust the image if necessary and tap Done to save changes.
Refresh the patient profile in Canvas and the image will appear under ID Cards