Enable Automated Patient Statements and Payment Reminders via Email
Last updated: September 30, 2026
Overview
Automated patient statements let Canvas email patients with an outstanding balance on a recurring schedule. Each email tells the patient a statement is ready and links them to the Payments page of the patient portal, where they can view the statement and pay by card. Canvas keeps resending on a set interval until the balance is paid.
This article walks an administrator through turning this on for their instance.
Required role and permissions
To complete this setup, you need a Canvas user with access to Admin and the following permissions, granted by the Administrative group:
Staff status, which allows the user to open Settings
constance | config | Can change config, required to change the Constance settings below
api | organization | Can change organization, required to save changes on the Organization page
api | organization setting | Can add organization setting and Can change organization setting, required only if you set an initial send delay (optional step below)
If you do not see Constance: Config under Settings, or the settings are read-only, you are not in the Administrative group. Ask an existing administrator on your instance to add you to it.
Before you start
Your sending domain must be verified. Statement emails are sent from the address in your organization's
defaultEmailsetting, and that address's domain must be authenticated with Canvas's email provider. See 📄 Verify Your Sending Domain for Canvas Email (SendGrid Domain Authentication)Stripe must be configured. Patients pay through the portal using Stripe. Confirm Stripe API keys are entered in the Stripe Configuration section of Constance: Config. See Collect Patient Payments: Configuration & Set Up.
Review outstanding patient balances. The first time the job runs, it sends a statement to every patient who currently has a patient balance, not only to new balances. Confirm those balances are accurate before enabling.
Automated statements only send from production instances. Enabling these settings on a sandbox, staging, or demo instance does not send any emails.
Step 1: Configure Constance settings
From the Schedule View, open the triple line menu, select Settings, and then select Config under the Constance heading.
Scroll to the Billing section and set the following:
Setting | Set to |
|---|---|
| True |
| True |
| Number of days (default 15) |
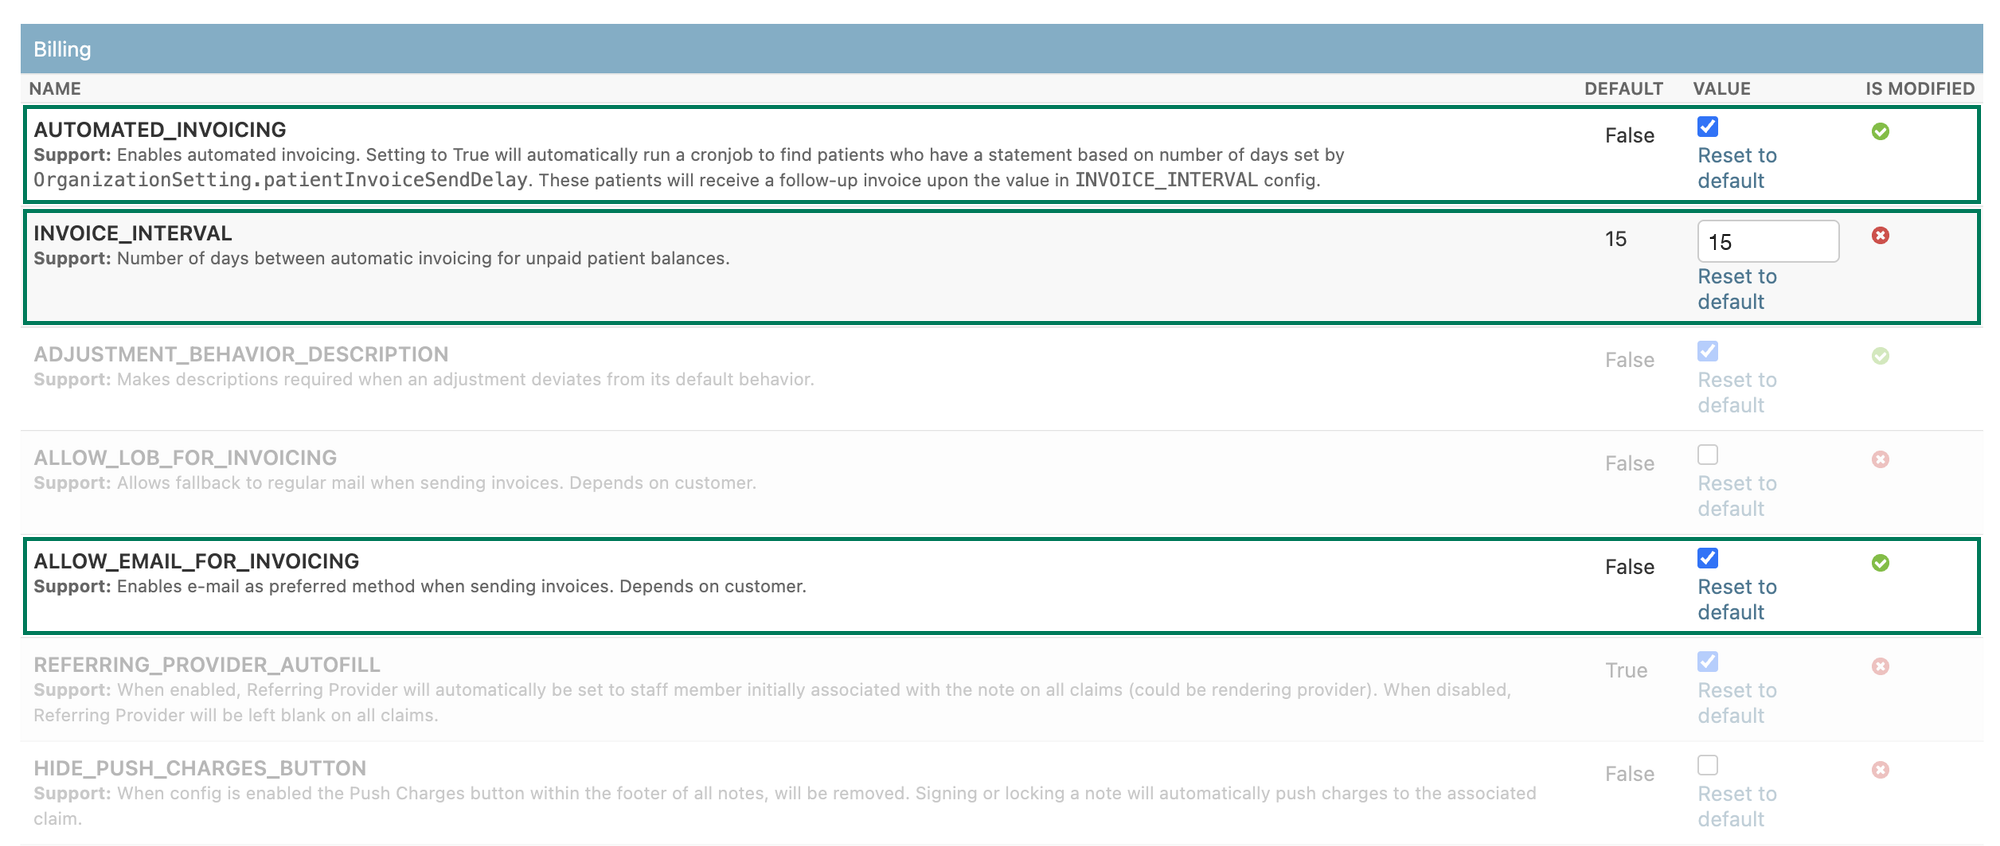
Scroll to the Patient App section and confirm both of these are True:
Setting | Set to |
|---|---|
| TRUE |
| TRUE |
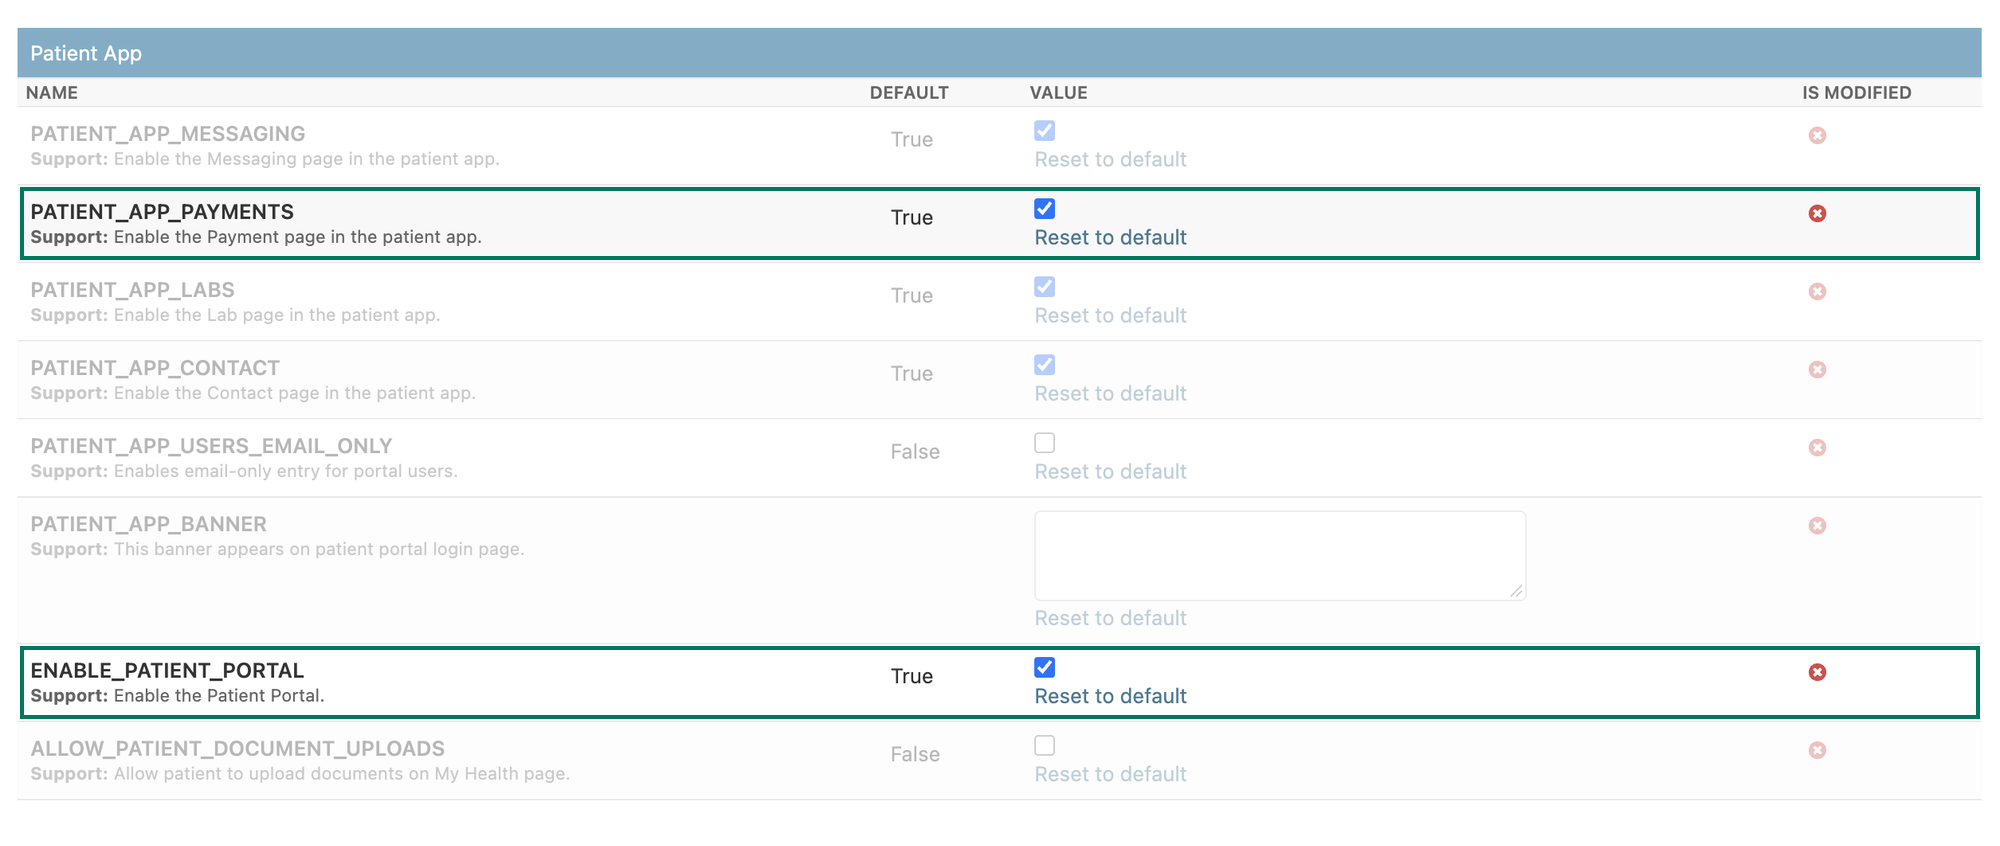
Click Save.
Step 2 (optional): Set an initial send delay
By default, a patient can receive a statement as soon as they have a balance. To give your team a grace period first, add a delay measured from the date of service.
From the triple line menu, select Settings, then Organizations, and select your organization.
In the Organization settings section, add a setting (or edit it if it already exists):
Name:
patientInvoiceSendDelayValue:
{"days": 7}, replacing 7 with the number of days you want
Click Save.
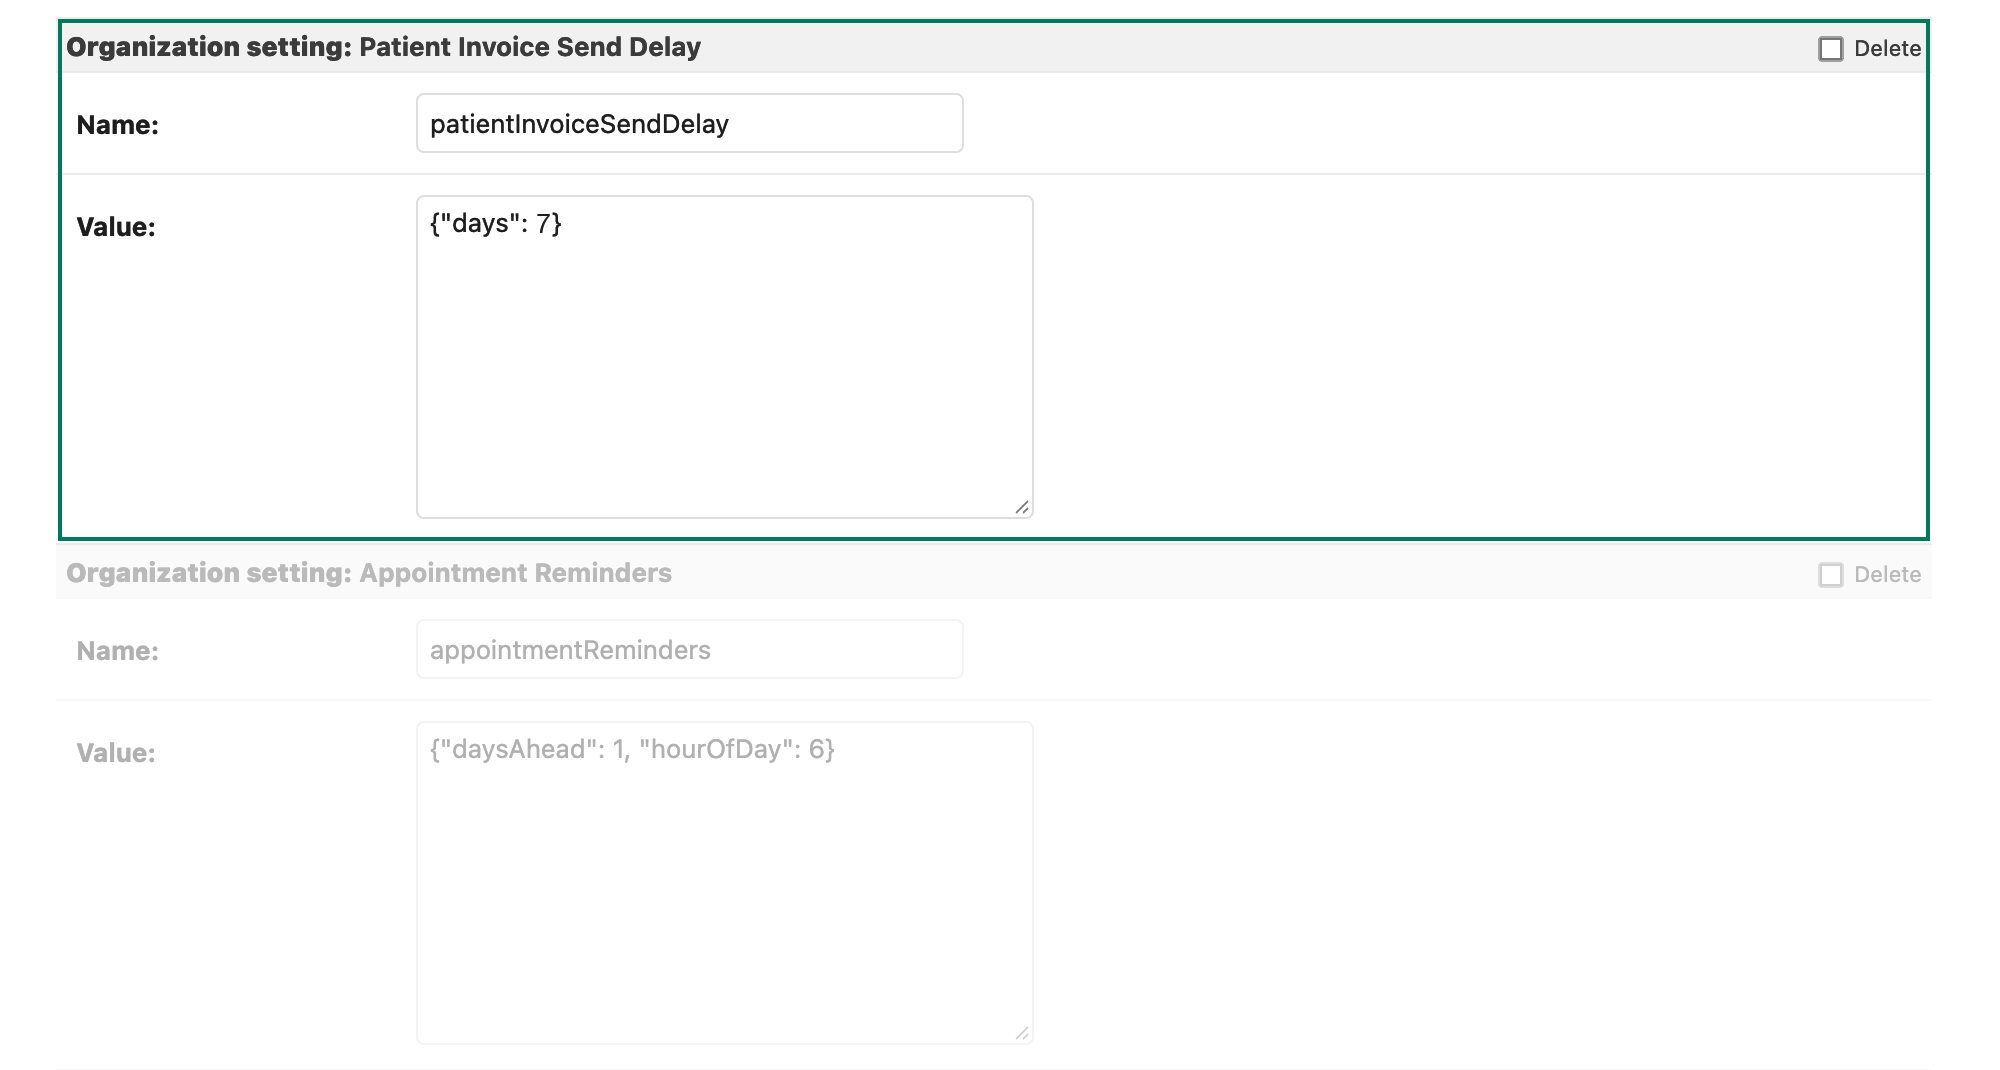
The delay counts from the date of service, not from the date the balance moved to patient responsibility.
What patients receive
Subject: "Payment due for [your practice short name]"
Body: the patient's name, a note that your practice has sent them a statement, a link to the Payments page in the patient portal, and your practice's main phone number for questions.
From the portal, the patient can view the statement, pay the full balance or edit the amount, and use a saved or one-time card.
Who receives statements
Statements go to every patient with an outstanding patient balance, regardless of which billing queue the claim is in.
When a patient has a guarantor who can be contacted, the statement is addressed to the guarantor and includes the balances of their dependents.
An email is sent only to an email address on the patient's profile that is verified, has consent for contact, and is active. If a patient has no qualifying email, their statement is recorded with an error and not delivered.
After a statement is sent, the same patient is not sent another until the
INVOICE_INTERVALhas passed.
Verify it is working
The job runs once a day. The day after enabling, open a patient who had an outstanding balance, select the document icon, and then Statement. The statements list should show a new statement with Workflow automated and Originator Canvas Bot. Open the PDF to review what the patient received.
The list shows that a statement was created, not whether the email was delivered. If a patient reports not receiving a statement, confirm their email address on their profile is verified, has consent for contact, and is active.
Turning it off
Set AUTOMATED_INVOICING to False in Constance: Config and save. No further automated statements are created or sent. Manual statements (one-off and batch) are not affected.
Related articles
Claim Management (Invoicing and Statements)